Printer Model:voron 2.4
MCU / Printerboard:BIGTREETECH Octopus Max EZ
Host / SBC:raspberry 4
klippy.log
Fill out above information andin all cases attach yourklippy.logfile (use zip to compress it, if too big). Pasting yourprinter.cfgis not needed Be sure to check our “Knowledge Base” Category first. Most relevant items, e.g. error messages, are covered there
What is the process you used to determine the device serial that you put in your printer.cfg?
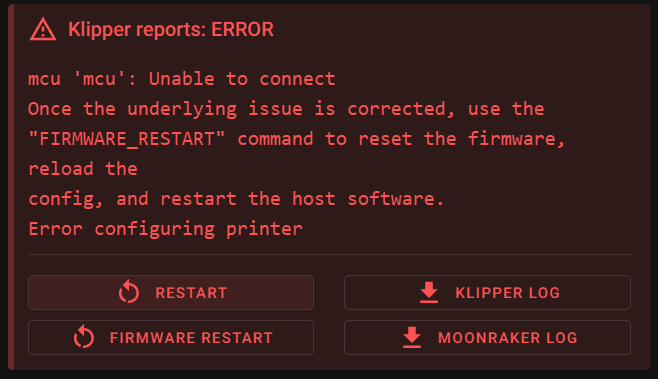
When I look at your klippy.log, it indicates that:
mcu 'mcu': Unable to open serial port: [Errno 2] could not open port /dev/serial/by-id/usb-Klipper_stm32h723xx_30001C000C51313339373836-if00: [Errno 2] No such file or directory: '/dev/serial/by-id/usb-Klipper_stm32h723xx_30001C000C51313339373836-if00'
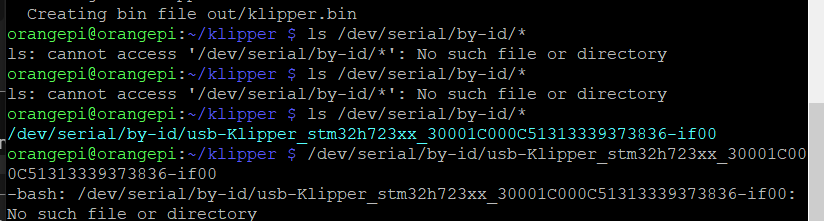
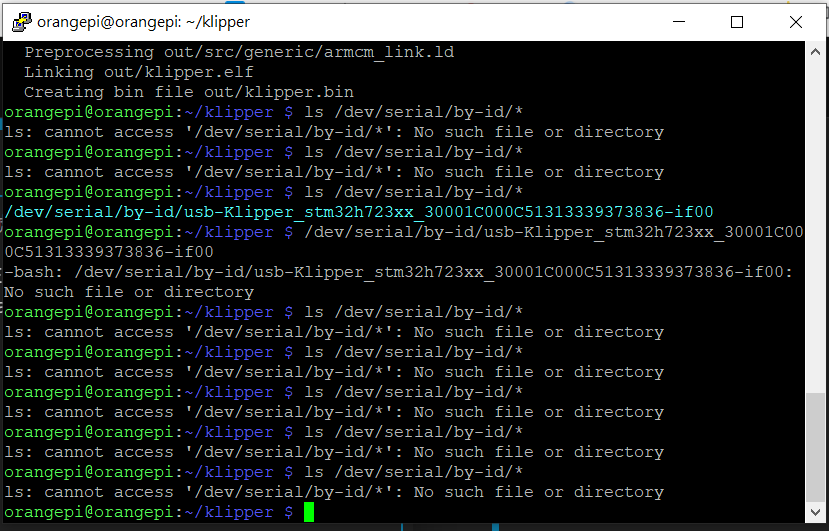
What do you get when you SSH into your system and execute:
You’re UserID is “orangepi” on hostname “orangepi”. Are you saying that when you imaged your Raspberry Pi 4, you set things up with “orangepi”?
Next, I asked for the process you used to set everything up and you’ve provided me with a 26 minute video.
I’m not going through the whole thing - but I did scan it and I see that the person making the video seems to use a very non-standard way of imaging the Raspberry Pi. That’s a big red flag.
Again, could you write out the process you used for imaging your host and how you built your firmware and loaded it into the Octopus Max EZ?
As for my last question:
You’ve answered:
What does that mean?
Did you run the ls /dev/serial/by-id command in the last half hour and what did you get?
Trust me, I have three printers, two of which are ORANGEPI 2 ZERO. I set them up this way to avoid having too many passwords. As for the RASPBERRY installation, it’s exactly the same as the video instructions. If you can, please watch the video. The steps until 24:02 are the same.
Are they all running Klipper? I’m trying to understand your experience level. I’m also wondering about how you identify the different printers if they all have “orangepi” as their hostnames.
The video shows a really convoluted way of doing things.
Now, are you using the mainsail version of the Raspberry Pi OS? I’m asking because I’ve had problems using it.
Can I suggest that you reimage your SD Card and use the following process:
Prepare the Raspberry Pi SD Card:
Download Raspberry Pi Imager: Obtain the official Raspberry Pi Imager tool for your computer.
Choose Operating System: Launch the Imager. Select “Choose OS” and navigate to "Raspberry Pi OS (other)” and select “Raspberry Pi OS Lite (64-bt)”
Configure Advanced Options: Before writing, click the gear icon (or Ctrl+Shift+X) for advanced options.
Enable SSH: This allows remote access to the Pi.
Set Hostname: Choose a recognizable name for your Pi on the network (e.g., “klipper-printer”). See my comment above regarding the “orangepi” hostname - it sounds like you have three printers with “orangepi” as the hostname and I’m not sure how that’s possible on the same network without having serious problems.
Set Username and Password: Create a secure username and password for SSH access.
Configure Wi-Fi (Optional): If using Wi-Fi, enter your network details.
Select Storage: Choose your MicroSD card.
Write Image: Click “Write” and confirm the process. This will erase all data on the SD card.
Put the SD Card into your Raspberry Pi, boot up make your network connection
Connect to the host by SSH’ing into your Raspberry pi using “ssh hostname@username”. You can use “Command Prompt” on a Windows PC if it’s Windows 10 or 11, on a Mac or Linux machine start up a Terminal window. Did I say I’m confused as how you work with three printers all with the same hostname “orangepi”?
Install Klipper (and Moonraker, Mainsail/Fluidd) using .KIAUH, as explained here:
When done, check to see that you have an instance of Klipper running by opening a browser tab at http://hostname
Don’t leave KIAUH but go back to the “Main Menu”
In the KIAUH Main Menu, select “4” for “Advanced”.
Select “1” for “Build” and enter in the board parameters:
When done, the build will take place automatically.
Next, go to Flash (Option “2”) and go through the “Regular flashing method”
Next go to ”make flash (default)”
Next “USB”
Select the Serial ID that comes up
Flash the new firmware
Once that’s done, go back to the ls /dev/serial/by-id process and see what happens when you update the minimal printer.cfg that is put in by default with your Serial ID.
If you are connecting, then you can update the printer.cfg with your printer specific information.
If you’re not familiar with Klipper and the Octopus Max EZ, then I can see the resources for setting up are really not acceptable. The video uses a process that I haven’t seen before; it could work but I don’t have the time, energy or interest verifying it. I looked at BTT’s “User Manual” and their instructions are pretty bad as well.
As a final note - when I asked for the process you used, what I gave you is what I expected.
Please provide as much information as possible, don’t editorialize or guess at what you think I’m asking for. I’m being very specific in my questions - answer them as explicitly as you can.
Hi, mykepredko, thank you so much! I just tried the instructions in the video again, and everything works fine. Thank you for your thoroughness. I have a printer, but I’ve never used this process before. I used a SPIDER board before, but it got stuck at this step, which is why I switched to an Octopus MAX EZ. There are so many internet resources these days, and everyone’s talking about different things. For example, I’ve tried at least three or four versions of the Raspberry Pi OS you mentioned. Not to mention ORANGEPI. I’m really new to this. As for your question (how can you use three printers with the same hostname “orangepi”?), I actually used the IP address to determine. As for KIAUH, I’ve also tried it, and it works really well. It just gets stuck at the last step: ls /dev/serial/by-id/* (I always use it on a SPIDER). Unfortunately, I’m very frustrated and still stuck at the flashing process. **Your method is actually similar to the video, but as a newbie, I’m still confused by the instructions (each step should be a paragraph of text and a photo). (This explains the hardware connection changes.) Perhaps this is something the manufacturer should provide, but sometimes manufacturers themselves can’t explain it clearly, even giving you URLs. Please read them carefully. I’m sure I’m not the first person to ask this question, but thank you. I may not have a substantive and direct answer to your question, but the internet needs people like you, who can help us newbies solve problems. Thank you again. If possible, do you have a method for booting the SPIDER?
Thank you for spending the whole afternoon with me on Sunday